A shimmering pool with pristine tiles is the epitome of luxury and relaxation. Whether you’re envisioning a serene oasis in your backyard or refurbishing a commercial pool, the process of installing pool tiles demands meticulous attention to detail. From choosing the right materials to mastering the installation techniques, every step plays a crucial role in achieving the perfect aquatic retreat. In this comprehensive guide, we’ll delve deep into the intricacies of pool tile installation, helping you navigate through the process with confidence and finesse.
Pool Tile Installer: The Key to a Successful Project
In any pool tile installation project, the expertise of a skilled pool tile installer is indispensable. While DIY enthusiasts may be tempted to tackle the job themselves, hiring a professional installer can ensure a flawless result and save you time and effort in the long run. Here’s why investing in a qualified pool tile installer is essential:
- Expertise and Experience: A seasoned pool tile installer possesses the knowledge, skills, and experience to navigate the complexities of the installation process with ease. They understand the intricacies of different tile materials, substrates, and adhesives, allowing them to deliver impeccable craftsmanship and superior results.
- Precision and Accuracy: Installing pool tiles requires precision and attention to detail to achieve a seamless finish. A professional installer has the expertise to plan the layout, cut tiles accurately, and ensure proper alignment and spacing, resulting in a visually stunning and structurally sound installation.
- Efficiency and Timeliness: With their efficient work practices and specialized tools, a professional installer can complete the project in a timely manner without compromising quality. They know how to optimize workflow, troubleshoot potential issues, and overcome challenges effectively, saving you time and minimizing disruptions to your daily routine.
- Compliance and Safety: Pool tile installation involves working with adhesives, grouts, and other materials that may pose safety hazards if mishandled. A licensed and insured pool tile installer adheres to industry regulations and safety standards, minimizing the risk of accidents or damage during the installation process.
- Warranty and Peace of Mind: Hiring a reputable pool tile installer often comes with the added assurance of warranty coverage for both labor and materials. This provides peace of mind knowing that any issues or defects will be promptly addressed, protecting your investment and ensuring long-term satisfaction with your pool tiles.
Understanding Pool Tile Materials
Before diving into the installation process, it’s essential to select the appropriate materials for your pool tiles. The choice of material not only impacts the aesthetic appeal but also determines the durability and maintenance requirements of your pool surface. Here are some popular options to consider:
- Ceramic Tiles: Known for their versatility and affordability, ceramic tiles come in a wide range of colors, patterns, and textures. They are resistant to fading, staining, and chemicals, making them an ideal choice for both residential and commercial pools.
- Porcelain Tiles: Renowned for their durability and low water absorption rate, porcelain tiles are a popular choice for outdoor pools. They are highly resistant to frost, heat, and fading, ensuring long-term beauty and performance.
- Glass Tiles: If you’re aiming for a luxurious and vibrant finish, glass tiles offer unparalleled elegance. They reflect light beautifully, creating a dazzling effect in the water. While glass tiles are more expensive than ceramic or porcelain, they add a touch of sophistication to any pool design.
- Stone Tiles: Natural stone tiles, such as travertine, slate, or granite, exude a timeless charm and rustic appeal. They are incredibly durable and resistant to harsh weather conditions, making them suitable for both indoor and outdoor pools. However, stone tiles require regular sealing and maintenance to prevent staining and erosion.
Preparing for Installation
Once you’ve chosen the right type of tiles for your pool, it’s time to prepare for the installation process. Proper preparation is crucial to ensure a seamless and long-lasting result. Here’s what you need to do:
- Surface Preparation: Thoroughly clean and inspect the pool surface to remove any dirt, debris, or old tiles. Repair any cracks or uneven areas to create a smooth and level base for the new tiles.
- Layout Planning: Plan the layout of your tiles carefully, considering factors such as pattern, alignment, and spacing. Use chalk lines or markers to guide the placement of the tiles and ensure precision during installation.
- Gathering Supplies: Stock up on essential supplies such as tile adhesive, grout, spacers, trowels, and tile saws. Invest in high-quality tools and materials to achieve professional results and minimize the risk of errors.
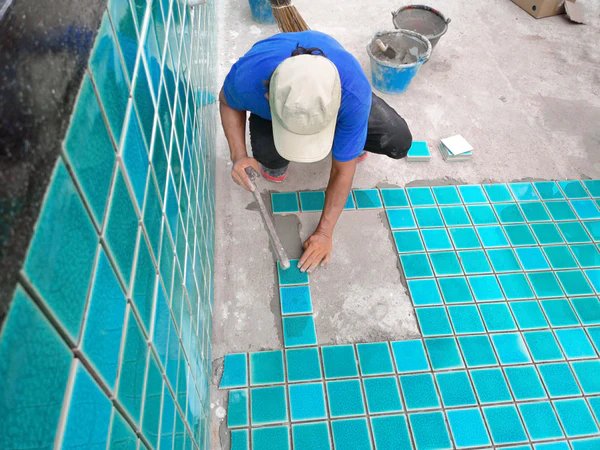
Mastering the Installation Process
With the proper preparation in place, you’re ready to embark on the installation journey. Follow these steps to execute the process with precision and finesse:
- Applying Adhesive: Begin by applying a layer of tile adhesive to the pool surface using a notched trowel. Work in small sections to prevent the adhesive from drying out before you can place the tiles.
- Placing Tiles: Carefully place each tile onto the adhesive, pressing firmly to ensure proper adhesion. Use tile spacers to maintain consistent spacing between tiles and achieve a uniform look.
- Cutting Tiles: As you reach the edges or corners of the pool, you may need to cut tiles to fit the desired dimensions. Use a tile saw to make precise cuts, taking care to measure accurately beforehand.
- Grouting: Once all the tiles are in place and the adhesive has cured, it’s time to apply grout to the joints. Use a rubber float to spread the grout evenly, pressing it into the gaps between tiles.
- Cleaning and Sealing: After the grout has set for a few hours, wipe away any excess grout with a damp sponge. Allow the grout to cure completely before applying a sealant to protect the tiles from water damage and stains.
Maintaining Your Pool Tiles
Congratulations, you’ve successfully installed stunning tiles that elevate the beauty of your pool to new heights. However, the journey doesn’t end here. Proper maintenance is essential to preserve the longevity and luster of your pool tiles. Here are some tips to keep them looking pristine:
- Regular Cleaning: Establish a routine cleaning schedule to remove dirt, algae, and debris from the tiles. Use a mild detergent and a soft brush or sponge to scrub away any buildup without damaging the surface.
- Avoid Harsh Chemicals: Steer clear of harsh cleaning chemicals or abrasive tools that can erode the grout or damage the tiles. Opt for gentle, pH-balanced cleaners specifically designed for pool surfaces.
- Monitor Water Chemistry: Maintain proper water chemistry levels to prevent scale buildup, staining, or discoloration of the tiles. Test the water regularly and adjust the chemical balance as needed to ensure optimal clarity and hygiene.
- Inspect for Damage: Periodically inspect the tiles for any signs of damage, such as cracks, chips, or loose tiles. Promptly repair any issues to prevent further deterioration and maintain the structural integrity of the pool.
Conclusion
In summary, pool tile installation is a meticulous process that requires careful planning, precise execution, and ongoing maintenance. By choosing the right materials, preparing the surface diligently, and mastering the installation techniques, you can create a stunning aquatic paradise that exudes elegance and luxury. With proper care and attention, your pool tiles will continue to dazzle for years to come, providing a serene retreat for relaxation and enjoyment. Dive into excellence and transform your pool into a masterpiece of craftsmanship and beauty.