In the realm of personal adornment, few accessories are as versatile and expressive as bracelets. Crafting your own DIY bracelets for Christmas Gifts allows you to infuse your personality and creativity into every piece, making them truly unique. Whether you’re a seasoned jewelry maker or a beginner looking to explore a new hobby, creating personalized bracelets is a rewarding and enjoyable endeavor. This guide will walk you through the basics of DIY bracelets, from materials and tools to techniques and design ideas.
Materials and Tools
Before diving into the crafting process, it’s essential to gather the necessary materials and tools. Here’s a list of basics you’ll need to get started:
- Beads: These can be glass, plastic, wooden, or even semi-precious stones, depending on your style and budget.
- Stringing Material: Options include elastic cord, nylon thread, or metal wire, each suitable for different types of bracelets.
- Clasps and Findings: These are essential for finishing your bracelets and securing them around the wrist.
- Tools: Basic tools include pliers (round-nose, chain-nose, and flat-nose), scissors, and a bead mat to keep your beads organized.
Basic Techniques
Understanding a few fundamental techniques can greatly enhance your bracelet-making skills. Here are some techniques to master:
- Stringing: This is the simplest method, involving threading beads onto a cord. Elastic cord is popular for stretch bracelets, while nylon thread works well for more intricate designs.
- Wire Wrapping: This technique involves wrapping wire around beads or components to create unique designs. It’s great for adding a professional touch to your bracelets.
- Knotting: Adding knots between beads can create space and add a decorative element. This technique is often used with pearls or larger beads.
Design Ideas
The beauty of DIY bracelets lies in the endless design possibilities. Here are a few ideas to inspire your creativity:
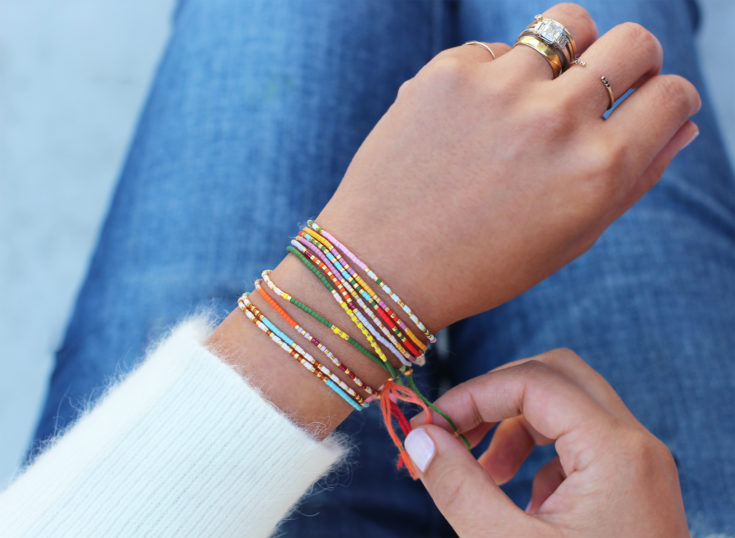
- Beaded Bracelets: Simple yet elegant, beaded bracelets are a staple. Mix and match different bead sizes, colors, and textures for a customized look.
- Charm Bracelets: Add small charms to a chain or beaded bracelet to create a piece that tells a story. Charms can represent hobbies, interests, or significant life events.
- Wrap Bracelets: These bracelets wrap around the wrist multiple times, creating a layered look. They often combine beads, leather, and metal elements.
- Friendship Bracelets: Traditionally made with embroidery floss, these colorful, woven bracelets are perfect for gifting to friends.
Personalization Tips
Personalizing your bracelets makes them extra special. Here are some ways to add a personal touch:
- Initials and Names: Use letter beads or charms to spell out names, initials, or meaningful words.
- Birthstones: Incorporate birthstone beads to create a personalized piece for yourself or as a gift.
- Color Schemes: Choose colors that reflect the recipient’s favorite hues or have symbolic meaning.
- Custom Charms: Look for unique charms that represent personal interests, such as hobbies, pets, or travels.
Step-by-Step Guide
To get you started, here’s a simple step-by-step guide for making a basic beaded bracelet:
- Gather Materials: Choose your beads, stringing material, and a clasp.
- Measure and Cut: Measure your wrist and add an extra inch for comfort. Cut the stringing material to this length.
- String the Beads: Arrange your beads in a desired pattern on a bead mat, then string them onto the cord.
- Attach the Clasp: Use crimp beads and pliers to attach the clasp to each end of the bracelet.
- Finish and Trim: Secure the clasp, trim any excess cord, and your bracelet is ready to wear.
Tips for Success
- Plan Your Design: Before starting, lay out your beads and components to plan your design. This helps ensure a cohesive look.
- Practice Techniques: Spend some time practicing basic techniques like stringing, knotting, and wire wrapping to build your confidence.
- Be Patient: Take your time, especially with more intricate designs. Rushing can lead to mistakes and frustration.
Conclusion
Crafting DIY bracelets is a fantastic way to express your creativity and make personalized jewelry that stands out as Christmas gifts. With the right materials, tools, and techniques, you can create beautiful, unique pieces that reflect your style and personality. Whether you’re making bracelets for yourself, as gifts, or even to sell, the joy of creating something with your own hands is unmatched. So gather your supplies, unleash your creativity, and start crafting your personalized bracelets today.