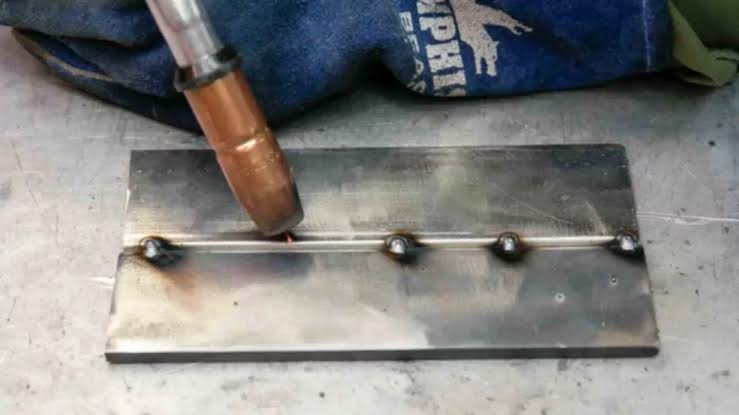
A welding torch applying tack welds to a metal plate.
If you’re into welding, or even if you’re just getting started, you might have wondered if a stick welder can handle tack welding. The good news? YES—it’s a great tool for the job! Tack welding is a handy technique that helps you temporarily hold pieces of metal together before you lay down your final welds. It’s all about keeping everything in place, making sure your project stays aligned and secure.
Stick welding, also known as Shielded Metal Arc Welding (SMAW), is known for its versatility and ease of use, making it an excellent choice for tack welding. Whether you’re tackling a small DIY project or something more heavy-duty, mastering tack welding with a stick welder can really up your welding game. In this article, we’ll answer the question – if it’s possible to tack weld with a stick welder and how you can effectively tack weld using a stick welder.
What is Tack Weld and How Does it Work?
Tack welding is a fundamental technique in the welding process, designed to hold metal pieces together temporarily before completing the final, more permanent welds. Think of it as a way to “tack” or “pin” your pieces in place, ensuring everything stays aligned and steady while you work on the full welds.
Here’s how it works: A tack weld is a short, quick weld that’s placed strategically along the joint of two metal pieces. These small welds are strong enough to keep the metal from shifting but easy enough to remove or adjust if needed. The idea is to create just enough adhesion to maintain the alignment without committing to a full weld right away. As you start working on a project, you might come across the tack weld symbol in your welding blueprints or diagrams.
This symbol is used to indicate where tack welds should be placed to ensure the stability and alignment of the workpieces during the welding process. Once the pieces are securely tacked, you can move on to completing the full welds, confident that your workpieces will stay in place and aligned as you apply more heat and filler material. This makes tack welding an essential step in achieving clean, accurate welds in any metalworking project.
What is a Stick Welder?
A stick welder, also known as a Shielded Metal Arc Welder (SMAW), is one of the most widely used welding tools, known for its versatility and simplicity. It’s a type of welding machine that uses a consumable electrode, commonly referred to as a “stick,” to create an electric arc between the electrode and the metal workpiece. This arc generates intense heat, which melts both the electrode and the metal, allowing them to fuse together as the weld cools.
The “stick” in a stick welder is actually a metal rod coated with flux, which serves two essential purposes. First, the flux creates a protective shield around the weld area as it burns, preventing contamination from the surrounding air. Second, the flux stabilizes the arc, making it easier to control the welding process and achieve a strong, clean weld.
One of the key advantages of a stick welder is its ability to work in various environments, including outdoors and in less-than-ideal conditions. It’s effective on a wide range of materials, including steel, stainless steel, and cast iron, making it a go-to tool for many welders, both professional and hobbyist. Whether you’re working on heavy-duty construction projects or simple repairs, a stick welder offers the flexibility and power needed to get the job done.
Can You Tack Weld with a Stick Welder?

Absolutely, you can tack weld with a stick welder, and it’s actually a common practice in many welding projects. Tack welding with a stick welder is particularly useful when you need to temporarily hold pieces of metal in place before performing the final, continuous welds. The strength and versatility of stick welding make it an excellent choice for this task, whether you’re working on structural steel, repair jobs, or custom fabrication.
Working Principle
The working principle of tack welding with a stick welder is rooted in the same basic concepts as any stick welding operation, but with a focus on precision and control for smaller, temporary welds. When you start tack welding, you first strike an arc between the electrode (commonly referred to as the “stick”) and the metal surface. This arc generates intense heat, which melts the tip of the electrode and a small section of the metal workpiece. The molten metal from the electrode fills the gap between the two pieces, creating a bond as it cools and solidifies.
The flux coating on the electrode plays a crucial role during this process. As it burns, the flux produces a gas shield that protects the weld pool from contaminants in the air, such as oxygen and nitrogen, which could weaken the weld. For tack welding, the goal is to create quick, short welds that are just long enough to hold the pieces together but easy to adjust or remove if needed.
Since tack welds are small, they cool and solidify rapidly, providing immediate stability to the workpieces. This quick cooling allows you to continue working on the project without waiting for long periods. The tack welds offer sufficient strength to maintain alignment, yet they are not permanent, which is essential for making any necessary adjustments before proceeding with the full welds.
How to Tack Weld with a Stick Welder
Prepare the Workpieces: Start by thoroughly cleaning the metal surfaces where you plan to weld. Use a wire brush, grinder, or sandpaper to remove any rust, paint, oil, or other contaminants that could affect the quality of the weld. Proper preparation ensures that the tack welds will adhere strongly and won’t compromise the final weld’s integrity.
- Choose the Right Electrode
Selecting the correct electrode is crucial for successful tack welding. For general-purpose tack welding, a 3/32-inch or 1/8-inch electrode is commonly used. The electrode should be appropriate for the type of metal you’re welding—E6011 and E6013 electrodes are popular choices for steel due to their versatility and ease of use. Adjust the welder’s amperage to match the electrode size and the thickness of the metal. Lower amperage settings are typically used for tack welding to prevent burning through the material.
- Strike and Maintain the Arc
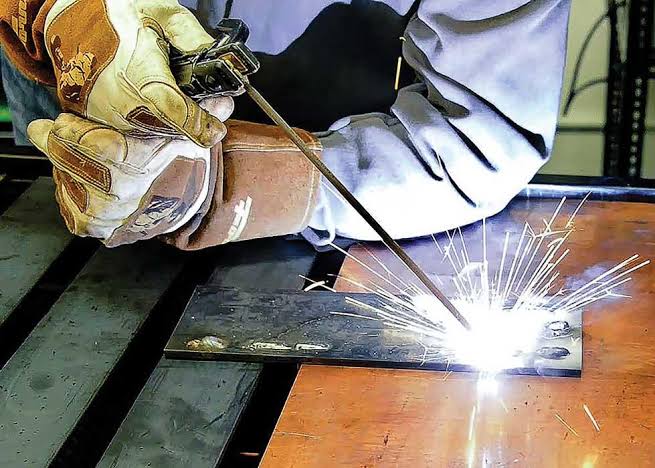
Hold the electrode at a slight angle (around 15-20 degrees) relative to the workpiece. To strike the arc, quickly tap the electrode against the metal surface and then lift it slightly to maintain the arc without sticking. This step requires a steady hand and practice, as the goal is to establish a stable arc that can create a small, controlled weld.
- Apply the Tack Welds
With the arc established, create a small weld by moving the electrode in a short, controlled motion. A typical tack weld is about 1/2 inch in length, just enough to hold the metal pieces together temporarily. Apply tack welds at both ends of the joint and at regular intervals along the seam. The spacing of the tack welds depends on the length of the joint and the complexity of the project—more complex or longer joints may require additional tack welds for stability.
- Monitor and Adjust
After applying the tack welds, check the alignment of the workpieces. Tack welds are strong enough to hold the pieces in place but can be adjusted if necessary. If you need to reposition the pieces, you can grind off a tack weld, realign the pieces, and reapply the tack. This flexibility is one of the key benefits of tack welding, allowing you to make adjustments before committing to the final weld.
- Complete the Final Weld
Once the workpieces are securely tacked and properly aligned, you can proceed with the final welding. The tack welds will hold the pieces together as you lay down continuous, full-length welds to permanently join the metal. The tack welds will eventually become part of the final weld, or they may be ground off if they interfere with the final appearance.
- Finishing Up
After the final welds are completed, inspect the entire joint to ensure everything is securely in place. If necessary, grind down any rough spots or excess material to achieve a smooth finish. Proper finishing ensures that your welds not only hold strong but also look clean and professional.
Conclusion
Tack welding with a stick welder is a versatile and effective technique for securing metal pieces before final welding. By understanding the working principles and following proper procedures, you can achieve strong, precise tack welds that ensure your workpieces remain aligned and stable. Whether you’re a beginner or an experienced welder, mastering this technique with a stick welder opens up a range of possibilities for both small projects and large-scale jobs. With practice, you’ll find stick welding to be a reliable and essential tool in your welding arsenal.