Choosing the right FPV camera and transmitter is essential for an optimal flying experience. This article answers your key questions by breaking down the differences between camera sensor types, discussing the importance of field of view, and explaining how to ensure compatibility. By understanding these factors, you’ll be equipped to select the best FPV camera and transmitter for your drone, ensuring clear video feeds and enhancing your overall flight performance.
Understanding FPV Cameras
Types of FPV Cameras: Differences between CCD and CMOS sensors.
When it comes to FPV cameras, the two main types of image sensors are CCD and CMOS. Both have their own advantages and are suited for different flying needs.
CCD sensors were once the go-to for FPV pilots due to their solid performance in low light and their ability to handle fast light changes without distortion. They produce images with high contrast and less “jello” effect, which is caused by vibrations. However, the image quality can sometimes seem softer compared to the more modern CMOS sensors. CCD cameras are reliable and tend to perform consistently, though they’re now less common due to the rise of CMOS technology.
CMOS sensors, on the other hand, have quickly become the standard in most FPV cameras today. They offer higher resolution, giving you sharper and clearer images. While some cheaper CMOS cameras may struggle with motion blur or rolling shutter issues, the best models offer exceptional image quality. CMOS is also more versatile, often featuring adjustable settings to suit different flying environments. In addition, most low-light FPV cameras now use large CMOS sensors for better night performance.
In short, FPV cameras with CMOS sensors are generally more flexible and offer higher image quality, but CCD sensors are still preferred by some pilots for their stable, reliable performance.
Field of View: Key factors to consider when selecting an FPV camera.
The field of view (FOV) of an FPV camera determines how much you can see in your video feed. A wider FOV lets you see more of the environment, which is helpful for racing and flying in open spaces. However, a very wide FOV can cause distortion, making objects at the edges appear stretched or curved.
A narrower FOV gives you a closer, zoomed-in view, which is useful for spotting small obstacles but reduces your overall visibility. The FOV is mainly affected by the lens size and the camera’s sensor. Wider lenses offer a larger view, while narrower lenses focus more on the center.
When choosing an FPV camera, it’s important to pick a FOV that suits your flying style. Wide FOVs are great for fast flying, while narrower ones are better for detailed, precise flights.
Low-Light Performance: Importance for dusk and night flying.
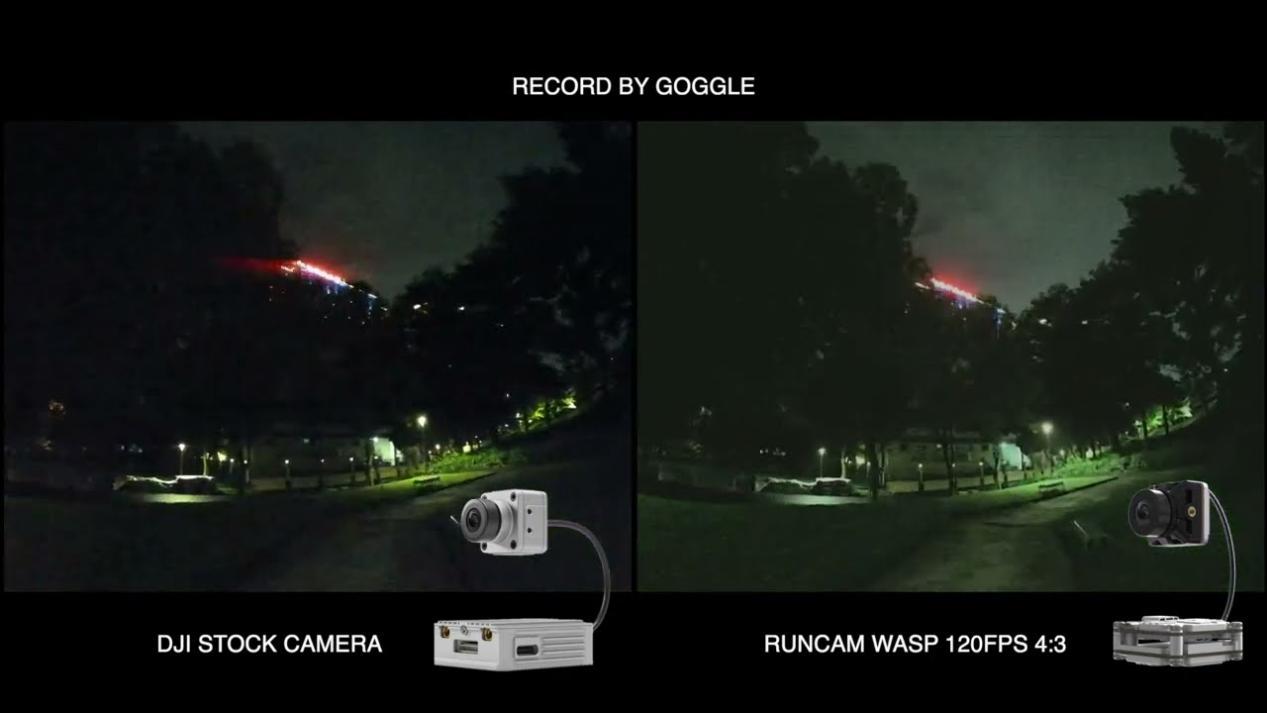
When flying in low light conditions, like indoors or at dusk, choosing an FPV camera with strong low light performance is crucial. One way to judge a camera’s capability in these conditions is by its LUX rating—the lower the LUX value, the better it performs in darker environments.
Cameras with larger sensors also tend to capture more light, improving visibility in dim settings. To ensure smooth flights in low light, look for an FPV camera designed specifically for night or indoor flying, as these often have optimized settings for reduced lighting.
Durability and Size: Choosing an FPV camera that fits your drone’s frame and flying style.
When selecting an FPV camera, size and weight are important factors to consider. The size is typically measured by the width between the mounting holes, and it needs to match your drone’s frame. Common sizes include:
- Standard (28mm)
- Mini (21mm)
- Micro (19mm)
- Nano (14mm)
Micro cameras are especially popular for modern drones, fitting well with 3-inch, 4-inch, and 5-inch frames. Smaller drones usually require Nano-sized cameras. Always check your drone’s specifications to ensure compatibility with your chosen FPV camera to avoid any mounting issues.
Selecting the Right FPV Transmitter
Power Output: Understanding transmission power (25mW, 200mW, 600mW) for your FPV transmitter.
The output power of your FPV VTX (video transmitter) is crucial for determining how far and clearly you can transmit video signals. Measured in milliwatts (mW) or decibels milliwatts (dBm), modern VTXs often allow you to adjust the output power based on your flying needs.
- 25mW: This is ideal for indoor flying or racing with others. It minimizes interference and provides enough range for most indoor tracks.
- 200mW to 600mW: These settings strike a balance for outdoor use, offering good range without consuming too much power.
- 800mW and above: Best for long-range flights, these higher settings help maintain clear video even in challenging environments.
- While more power can extend your range, it also increases heat generation in the VTX and can lead to interference with other pilots. In many regions, there are legal limits on how much output power is allowed, especially for the 5.8GHz band.
Keep in mind that boosting your output power doesn’t always lead to proportional range increases; for instance, you may need to quadruple the power to double the range. It’s also wise to avoid using high power when flying with a group, as it can disrupt others’ video feeds.
Frequency Bands: Why 5.8GHz is standard for FPV transmitters, and when to consider other frequencies.
The 5.8GHz frequency band is the go-to choice for FPV VTX (video transmitters) for several reasons. First, it is widely legal in many countries, making it accessible for pilots everywhere. Second, the higher frequency allows for smaller antennas, which is beneficial for drone design and portability.
5.8GHz offers a good balance between range and video quality, making it ideal for most flying conditions. This band also provides several preset channels, allowing pilots to easily switch frequencies to avoid interference with others flying nearby.
However, there are times when you might consider other frequency bands. For instance:
- 2.4GHz: This band can offer longer range but is more susceptible to interference from Wi-Fi and other devices. It’s less common for video transmission but may be suitable for specific setups.
- 1.3GHz: This frequency can penetrate obstacles better and is often used for long-range flying. It provides excellent video quality over distances, but it typically requires larger antennas.
When selecting a frequency for your FPV VTX, consider your flying environment and whether you will be flying with others. For most pilots, sticking with 5.8GHz will provide a reliable and clear video feed.
Latency and Image Quality: How the right FPV transmitter can minimize lag without sacrificing image clarity.
When it comes to FPV VTX (video transmitters), image quality is primarily influenced by your FPV camera rather than the transmitter itself. Investing in a high-end VTX may not significantly enhance image clarity. However, choosing a transmitter with excellent features and strong signal quality can greatly improve your overall flying experience.
Signal quality plays a crucial role in minimizing latency. Key factors include the quality and placement of your antennas, as well as the VTX’s ability to transmit accurately at the chosen frequency. Higher-end analog FPV VTXs typically provide more precise frequency transmission and cleaner signals, resulting in less interference with neighboring channels.
For improved signal reliability, consider digital VTXs with dual antennas. These can be mounted at a 90-degree angle, which helps maintain strong signal quality regardless of your drone’s orientation during flight. This setup can effectively reduce lag, ensuring smoother video feed and a more responsive flying experience.
Size and Heat Considerations: Finding a balance between compact FPV transmitters and heat dissipation.
Choosing the right FPV VTX (video transmitter) involves more than just picking a compact model. While smaller transmitters are convenient for lightweight drones, they often face challenges with heat management.
Compact designs can lead to overheating, especially during long flights or when operating at high power. An overheated FPV VTX can result in performance issues, including signal dropouts and even shutdowns, which can ruin your flying experience.
To mitigate this, look for FPV VTX options that prioritize heat dissipation. Some models incorporate features like ventilation slots or built-in heatsinks that help keep temperatures in check. If you frequently fly at higher output levels, investing in a slightly larger transmitter may be wise, as it can provide better cooling.
Compatibility Between FPV Camera and Transmitter
- Ensuring your FPV camera and transmitter are compatible in terms of video format, connectors, and power requirements.
- Avoiding common pitfalls with mismatched FPV camera and transmitter setups.
When setting up your FPV system, ensuring compatibility between your FPV camera and transmitter is crucial. This means checking that both components share the same video format, connectors, and power requirements.
First, confirm that your FPV camera outputs in a format that matches your transmitter’s capabilities, whether it’s analog or digital. Mismatched formats can lead to poor video quality or a complete failure to transmit the feed.
Next, pay attention to the connectors. Different cameras and transmitters may use varying connector types, which can complicate setup. Using adapters can sometimes help, but they may introduce signal loss, so it’s best to find a direct match when possible.
Finally, check the power specifications. Both your FPV camera and transmitter need to operate within compatible voltage ranges. Using a camera that requires more power than your transmitter can supply may result in inadequate performance or damage to either component.
By ensuring that your FPV camera and transmitter work well together, you’ll avoid common pitfalls and enjoy a smoother, more reliable flying experience. Compatibility is key to unlocking the full potential of your FPV setup!
Installation Tips for FPV Camera and Transmitter
Setting up your FPV camera and transmitter properly is crucial for achieving clear, reliable video feeds. Here are some best practices to enhance performance and minimize signal interference during installation.
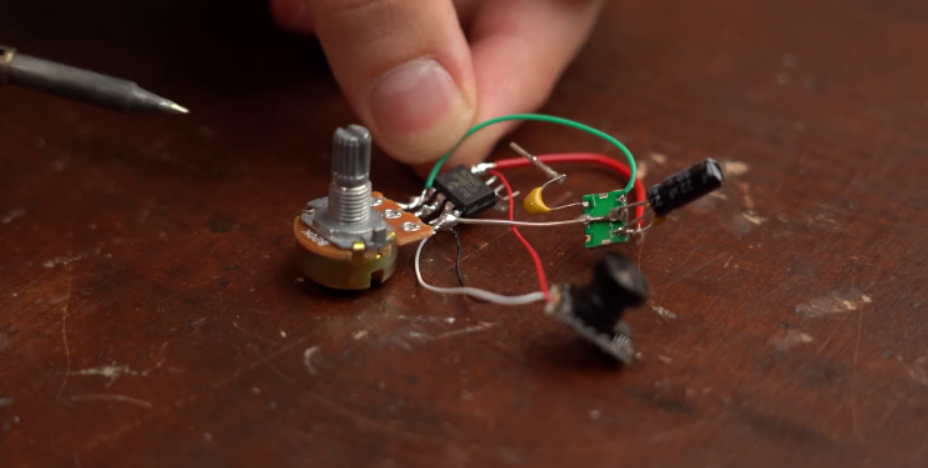
Best Practices for Wiring Your FPV Camera and Transmitter
When wiring your FPV camera and transmitter, keep the following tips in mind to reduce signal interference:
- Keep Wires Short and Neat: Shorter cables minimize resistance and potential signal loss. Try to route your wires neatly to prevent tangling, which can lead to electromagnetic interference (EMI).
- Use Quality Cables: Invest in high-quality, shielded cables. This helps protect against interference and ensures a strong, stable connection between components.
- Separate Power and Video Wires: Route your power cables away from video signal wires. Keeping these separated reduces the risk of crosstalk, which can distort your video feed.
By adhering to these wiring practices, you’ll lay a solid foundation for optimal performance.
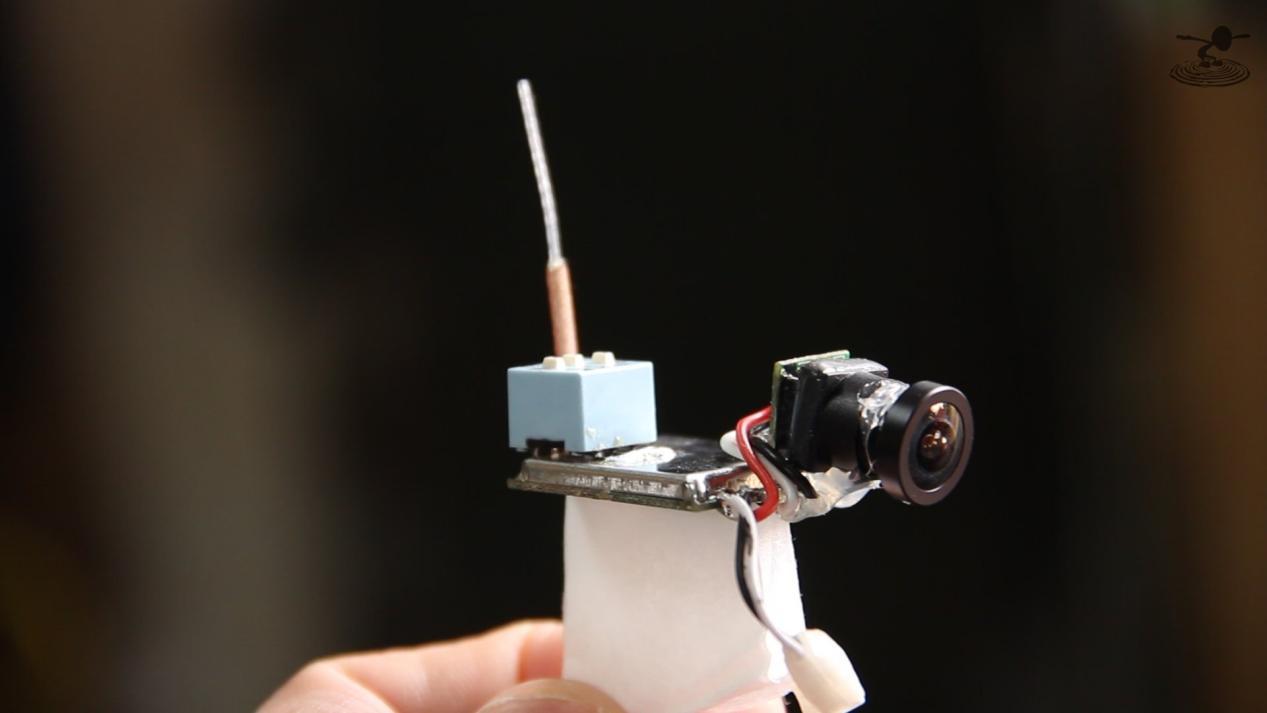
Positioning for Optimal Video Transmission
The positioning of your FPV camera and transmitter plays a significant role in video quality. Here are some tips to maximize signal strength:
- Mounting Height Matters: Elevate your FPV camera as much as possible within your drone frame. A higher position allows for a clearer line of sight, reducing obstructions that can degrade the video signal.
- Angle the Camera Correctly: Ensure your FPV camera is angled to capture your intended flight path. Proper alignment helps you navigate obstacles and enhances your overall flying experience.
- Transmitter Placement: Position your FPV transmitter away from the drone’s motors and electronic speed controllers (ESCs), as these components can generate noise and interfere with the video signal.
By following these installation tips, you’ll set your FPV camera and transmitter up for success, ensuring a smoother and more enjoyable flight experience.