If you’re into laser cutting, you know that getting the perfect cut isn’t just about having the right machine. It’s also about tweaking a host of settings to match your specific material and project needs. From adjusting the laser power and cutting speed to optimizing the focus position and beam diameter, each setting plays a crucial role in determining the quality of your cuts.
Whether you’re new to CNC laser cutting or looking to refine your skills, understanding these settings can help you achieve cleaner, more precise results, reduce waste, and enhance overall efficiency. In this guide, we’ll discuss 15 key settings that can transform your laser cutting projects and ensure you get the best possible results every time. Let’s get started!
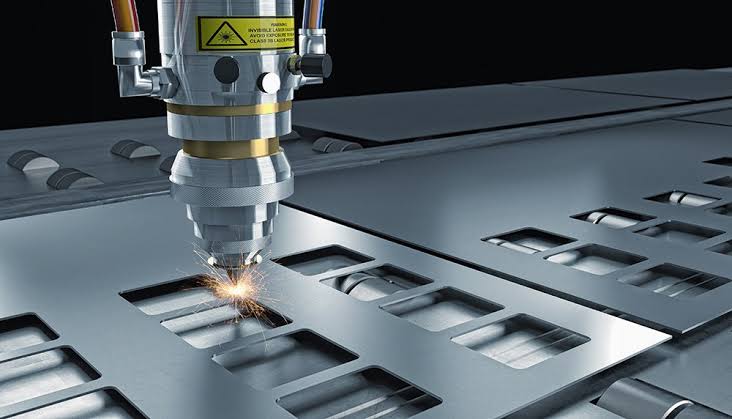
15 Key Settings for Laser Cutting
Achieving perfect laser cuts in your project is easier than you think. Here are 15 adjustable settings to help you get cleaner, precise results.
1. Laser Power
Laser power is crucial in determining how effectively your laser can cut through different materials. Higher power settings are typically used for thicker materials, while lower settings are suitable for thinner ones. Adjusting the power based on the material you’re working with is essential to avoid burning or insufficient cutting. For instance, cutting metals might require a high power setting, whereas cutting delicate materials like paper or thin plastics would need a lower power to prevent damage. Fine-tuning the laser power ensures clean cuts and preserves the integrity of the material, allowing you to achieve the best results for your projects.
2. Cutting Speed
Cutting speed refers to how fast the laser head moves along the material, playing a vital role in achieving high-quality cuts. The right speed makes all the difference in your results. Generally, slower speeds result in cleaner cuts because the laser has more time to interact with the material, but this can increase the risk of burning if the power is too high. On the other hand, faster speeds can lead to incomplete cuts, especially in thicker materials, as the laser might not have enough time to cut through completely.
To find the perfect balance, you need to consider both the material thickness and type. For example, laser cutting thin acrylic might require a faster speed compared to cutting thicker steel, which needs a slower pace to ensure a thorough cut. Adjusting the cutting speed helps minimize defects such as rough edges or incomplete cuts, ensuring you achieve the desired finish for your projects. Experiment with different speeds on test pieces to determine the optimal settings for your specific material and project requirements.
3. Focus Position
The focus position of the laser is critical for ensuring precise cuts. The laser’s focal point should be set accurately on the material’s surface. Adjusting the focus height according to the material thickness is necessary for sharp and accurate cuts. Incorrect focus can lead to poor quality cuts or even damage to the material. Using tools like focus gauges or automated focus adjustment features in your laser cutter can help maintain the correct focus, ensuring the laser beam is concentrated precisely where it needs to be. This adjustment ensures sharp, clean cuts and enhances the overall quality of your laser cutting projects.
4. Air Assist
Air assist plays a significant role in improving laser cutting quality. It helps remove debris and smoke from the cutting area, leading to cleaner cuts and preventing the material from catching fire. Adjusting the air pressure based on the material and its thickness is essential for optimal results. For example, higher air pressure may be needed for thicker materials or metals, while lower pressure might suffice for thinner or more delicate materials. Using air assist correctly can significantly enhance cutting precision and safety, allowing you to achieve better results with your laser cutting projects. It also extends the lifespan of your laser equipment by reducing residue buildup.
5. Pulse Frequency
Pulse frequency refers to the number of laser pulses per second, and it’s crucial for the quality and efficiency of the cutting process. Higher frequencies ranging from 5,000 to 20,000Hz are generally better for materials like acrylic, providing smoother cuts, while lower frequencies are suitable for metals that require more energy per pulse to cut effectively. Adjusting the pulse frequency based on the material type helps optimize the cutting process and achieve the best possible results. Experimenting with different frequencies can help you find the ideal setting for your specific material, ensuring clean and precise cuts. This adjustment is key to enhancing the overall efficiency and quality of your laser cutting projects.
6. Beam Diameter
The beam diameter, falling in the range of 1.5 – 2mm impacts the width of the cut and the level of detail you can achieve. Different types of lasers have varying beam diameters, which influence the precision and quality of the cut. A narrower beam produces finer details but may require more precise alignment, while a wider beam might be suitable for cutting thicker materials but could result in less detailed cuts. Adjusting the beam diameter based on the desired level of detail and material thickness is crucial. For instance, if you’re working on intricate designs, a narrower beam will be beneficial. However, for thicker materials, a slightly wider beam might be more effective. This adjustment helps balance the need for precision with the material’s cutting requirements, ensuring clean and accurate cuts every time.
7. Assist Gas Type and Pressure
Using different assist gasses like oxygen, nitrogen, or air can significantly impact the cutting quality and speed. For example, oxygen can enhance cutting speeds on metals by producing an exothermic reaction, while nitrogen can produce cleaner cuts on stainless steel by preventing oxidation. Adjusting the gas pressure to match the material being cut is also crucial. Higher gas pressure may be needed for thicker materials to ensure the debris is efficiently blown away, while lower pressure might be sufficient for thinner materials. Choosing the right assist gas and pressure settings ensures optimal cutting performance and quality, allowing you to achieve precise and clean cuts tailored to your specific materials.
8. Table Height and Leveling
Ensuring that your cutting table is at the correct height and level is crucial for consistent results. If the table is uneven, it can lead to inconsistent cuts and potential damage to your material. Regularly checking and adjusting the table height and leveling helps you maintain cutting accuracy. Using tools like spirit levels or automated leveling systems can simplify this process. By keeping your table properly leveled, you ensure that your laser cutter operates at its best and produces high-quality cuts every time.
9. Nozzle Type and Condition
The type and condition of your laser nozzle significantly impact the quality of your cuts. Different nozzle types may be needed for different materials, and it’s essential to ensure that your nozzle is clean and undamaged. A dirty or damaged nozzle can lead to poor cut quality and potential damage to your material. Regularly inspecting and maintaining your nozzle helps achieve clean and precise cuts. By keeping your nozzle in top condition, you prolong the lifespan of both the nozzle and your laser cutter, ensuring consistent performance.
10. Cooling System
A well-maintained cooling system prevents your laser from overheating and ensures consistent performance. Overheating can lead to damage to the laser and poor cut quality. Regularly checking and maintaining the cooling system, including coolant levels and temperature controls, helps prevent overheating. Ensuring that your cooling system functions correctly extends the lifespan of your laser cutter and maintains high cutting quality, even during prolonged use. Regular maintenance of the cooling system is key to preventing disruptions and ensuring smooth operation of your laser cutter.
11. Cut Path Optimization
Optimizing the cut path can significantly reduce cutting time and improve efficiency. By arranging the cut sequence to minimize travel time and material waste, you can achieve faster and more efficient cutting. Using software tools to optimize the cut path ensures that the laser follows the most efficient route. This optimization not only saves time but also reduces wear and tear on your laser cutter, improving overall productivity and extending the machine’s lifespan.
12. Kerf Width
Kerf width refers to the width of the cut made by the laser beam and is a crucial setting for ensuring the accuracy of your final product’s dimensions. It usually ranges from 0.08mm – 1mm. A narrower kerf width is ideal for fine, detailed work, allowing for precise cuts and intricate designs. On the other hand, a wider kerf might be necessary for cutting thicker materials, providing enough clearance for the laser to cut through without causing excessive wear on the machine. Adjusting the kerf width setting based on the material and the desired outcome helps you achieve more precise cuts and reduces material wastage. By optimizing this setting, you can ensure that your projects are dimensionally accurate and meet the required specifications.
13. Pierce Delay
Pierce delay is the time the laser spends at the beginning of the cut to penetrate the material before moving along the cutting path. This setting is particularly important when working with thicker or more challenging materials. A longer pierce delay allows the laser to create a clean entry point, ensuring that the cut starts smoothly and reduces the risk of material deformation or incomplete cuts. By adjusting the pierce delay to suit the thickness and type of material, you can achieve cleaner starting points and improve the overall quality of your cuts. This setting helps in minimizing defects at the beginning of the cut and ensures a consistent cutting performance throughout the project.
14. Software Settings
Using the correct software settings for your laser cutter is crucial for optimizing performance. Different software packages offer various features that can help enhance cutting quality and efficiency. Familiarizing yourself with the software and using it to its full potential ensures that you get the best results from your laser cutting projects. Regularly updating the software and taking advantage of new features can also contribute to improved cutting performance and efficiency. Proper software settings help in achieving precise cuts and streamlining the cutting process.
15. Maintenance and Calibration
Regular maintenance and calibration of your laser cutter are essential for consistent performance. This includes checking and cleaning the optics, replacing worn parts, and calibrating the machine regularly. Proper maintenance ensures that your laser cutter operates at its best, producing high-quality cuts consistently. Keeping a maintenance schedule and conducting regular checks helps prevent unexpected downtime and extends the lifespan of the machine, ensuring reliable performance for all your cutting projects. Regular calibration keeps your machine accurate and efficient, contributing to the overall success of your laser cutting endeavors.
Conclusion
By paying attention to these 15 key settings, you can significantly improve your laser cutting results. Each setting plays a vital role in achieving clean, precise cuts and optimizing your overall cutting process. Experiment with different settings, keep your equipment well-maintained, and stay informed about best practices to get the most out of your laser cutting projects.
This comprehensive approach ensures high-quality outcomes and enhances your efficiency, making your laser cutting endeavors more successful. For expert CNC machining services and top-quality laser cutting solutions, contact Zintilon. Let us help you achieve precision and excellence in all your manufacturing projects.